How To Install A Wallpaper Mural

Materials You Will Need
- Paste-the-wall wallpaper mural. I’m using my Diane Hill x Harlequin Rosa mural
- Wallpaper adhesive (Harlequin brand or Albany yellow top)
- Brush and roller
- Smoothing tool
- Measuring tape
- Spirit level or laser level
- Pencil
- Utility knife
- Scissors
- Drop cloth or protective covering for the floor
- Sponge and bucket of water
The Perfect Pink Bedroom
A beautiful pink oasis of calm is a dream bedroom for many girls, and this is exactly what my daughter Rosie was aiming for when we decorated her room.
Rosie chose the 'Rosa' wallpaper from my Harlequin collaboration collection. 'Rosa' was inspired by the amazing American civil rights activist Rosa Parks and is full of elegant cascading cherry blossoms on a pastel pink background - a soft yet bold design, perfect for a pink paradise bedroom!
I'm so excited to share this process with you! But before we get into the step-by-step guide, take a look at the final results...

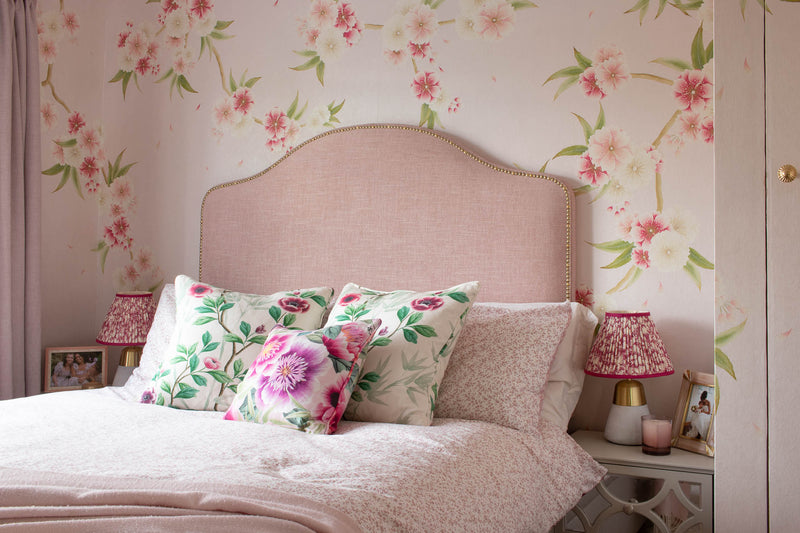
Rosie's finished room with 'Rosa' wallpaper & 'Marsha' and 'Lady Alford' cushions made to measure by Jane Clayton.

Up close look at the bedroom's finished look including wallpaper and fabric from my Harlequin x Diane Hill collection
Step 1: Prepare the wall
Ensure that the wall is smooth, clean, and dry. Remove any existing wallpaper, dirt, or imperfections. Fill in any cracks or holes and sand them down. Wipe the wall with a damp cloth to remove dust or debris.
Step 2: Plan the placement of the wallpaper mural
Decide which wall will be your main focal point and plan the placement of the design. When you purchase one roll, you will get 4 panels which you will cut into your desired length.
My Harlequin wall murals come with a miniature guide for each panel, which is super handy for planning your design. I recommend cutting out the miniatures into 4 panels to work out your design placement and where to make your cuts from the top and bottom.

Miniature wallpaper mural guide cut into strips and sections to plan my design
Tip : To help determine the position of the mural on the wall, you can use a handy calculation: divide the actual wallpaper panel height by the miniature wallpaper panel height. For example, 300cm divided by 26cm = 11.5. Now you can multiply or divide by 11.5 to work out any measurement from miniature to wall and vice versa. This will ensure everything on the wall matches your miniature layout.
When you get a design such as Rosa, the temptation may be to start hanging from the very top of the floral design so that you don’t cut away any of the flowers. But actually, if you have a shorter wall like mine, then I suggest cutting from the top and bottom. This is because the pattern has been designed to have lots of lovely negative space to give the feeling of a bespoke mural.

'Rosa' wallpaper mural framing the bedhead
I also played with the position of my main focal wall, the bedhead wall. I wanted to choose a section of design that framed the bedhead, so I used the miniature panels to work this out.
Planning the most important wall is key, and the rest will flow easily from here!
Step 3: Measure and cut the wallpaper
Start hanging the mural in the left-hand corner of your main feature wall. Since you cannot wrap wallpaper around an inside corner, you will need to cut a vertical seam and overlay the matching piece by a few millimeters. This practice is common and not noticeable since corners are rarely perfectly straight. Always leave at least 15cm allowance top and bottom. If you cut too short, you can paste the off cut back in, and it's hardly noticeable.
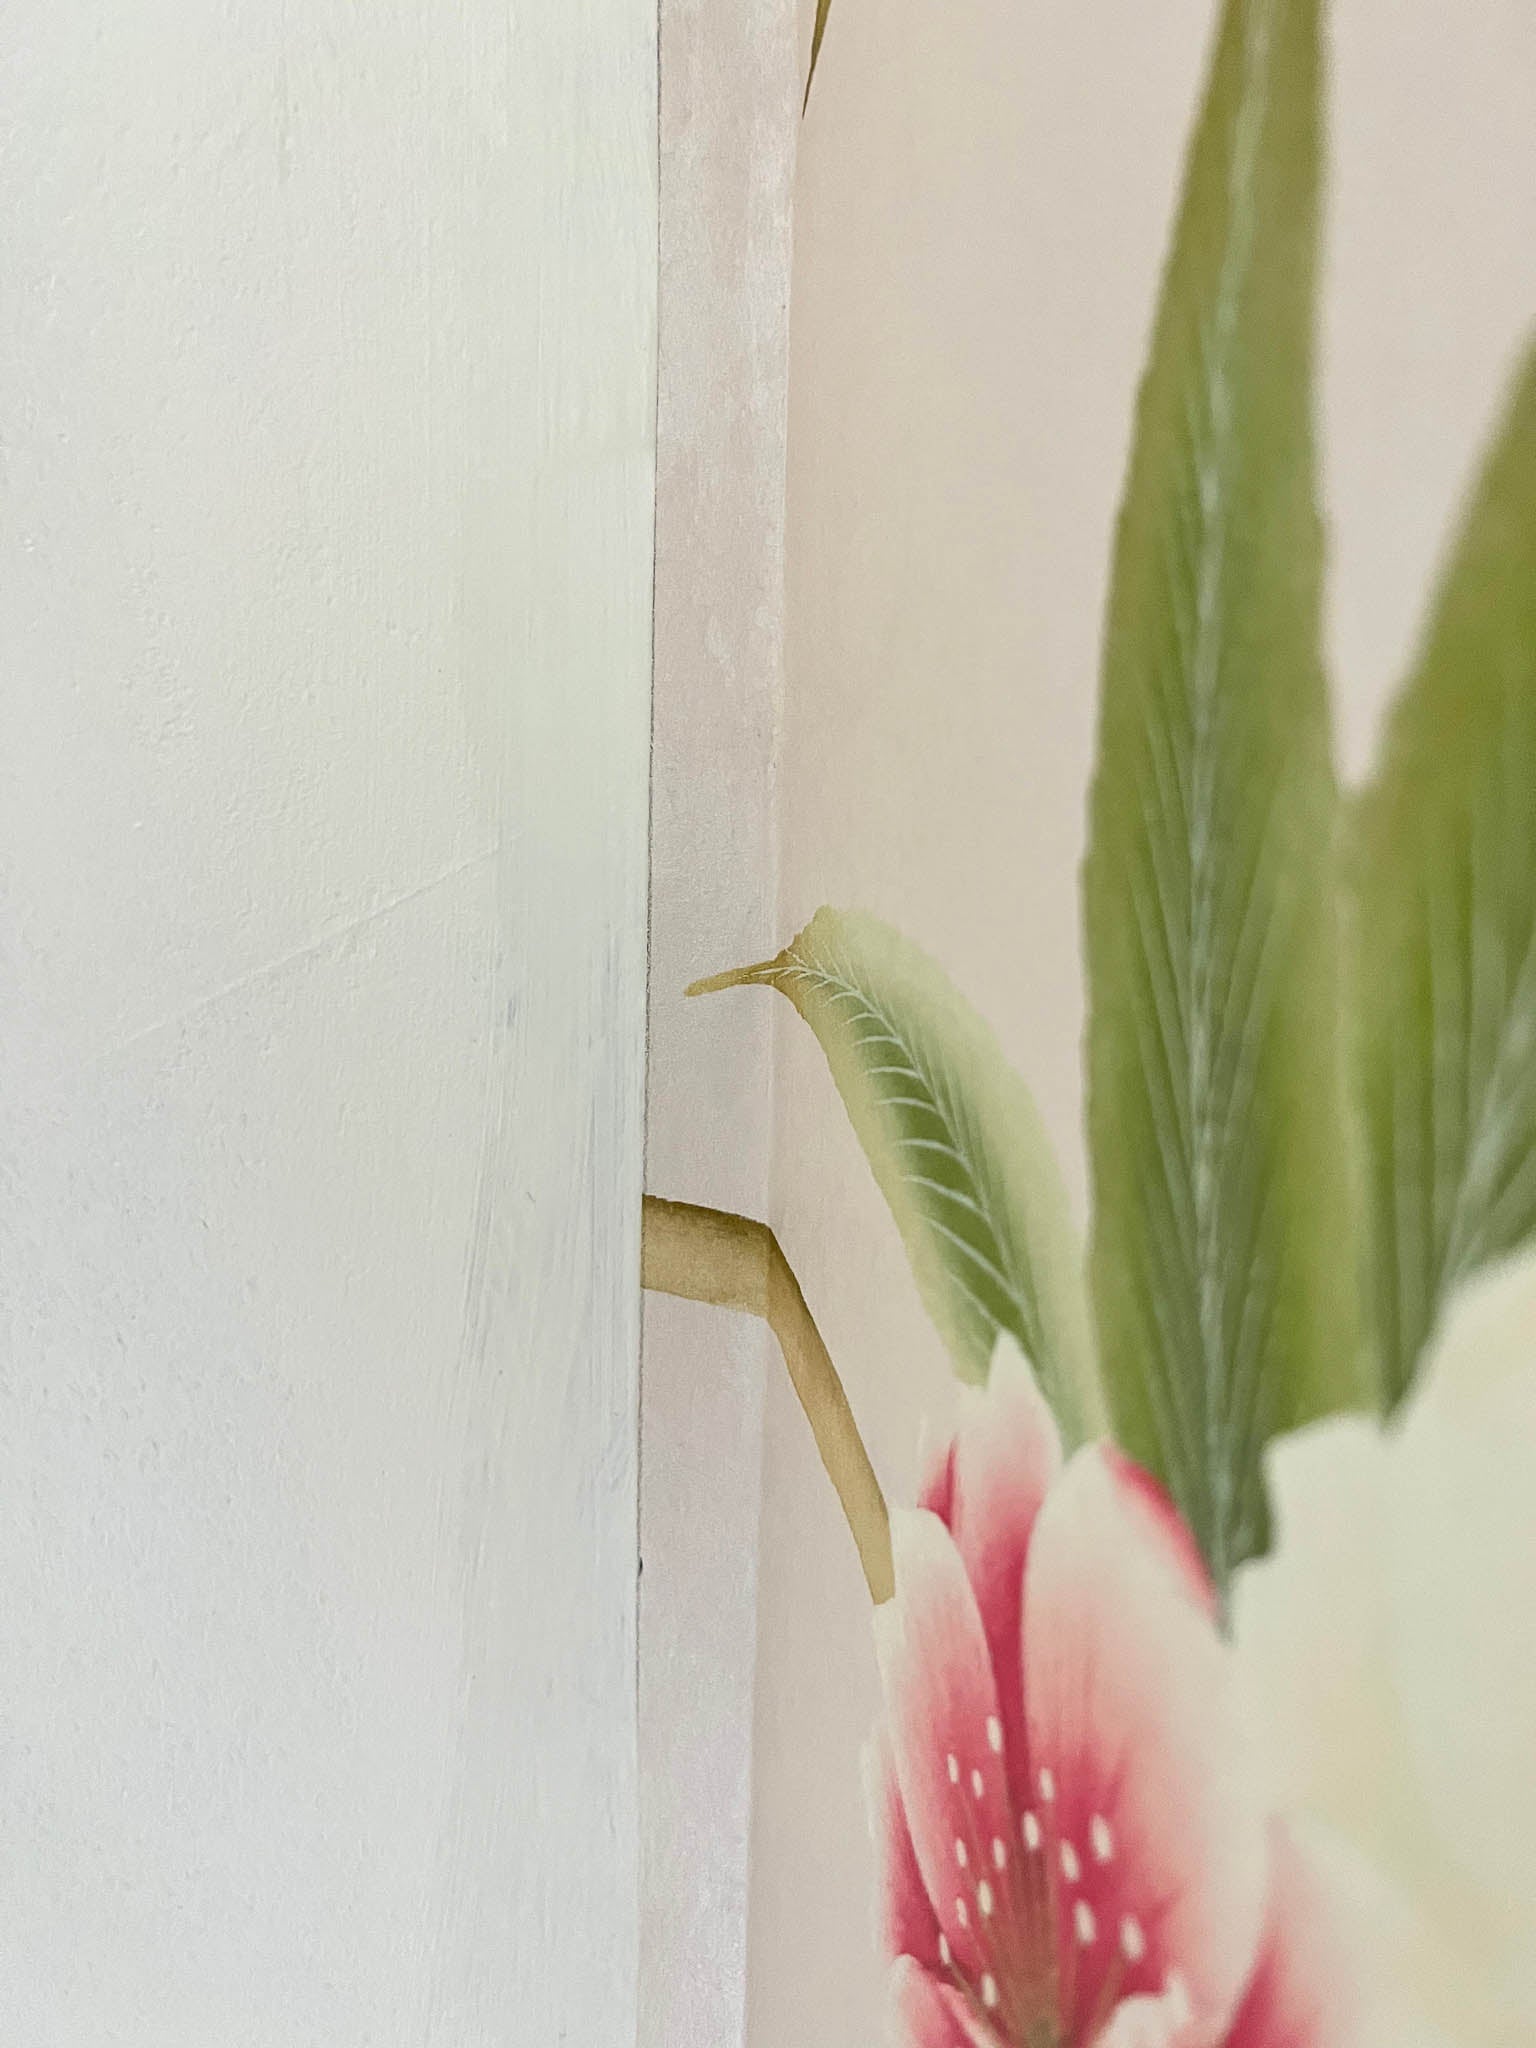
Edge of wallpaper panel slightly overlapping onto the next wall
This image shows the edge of the panel wrapping slightly onto the next wall, the next panel will slightly overlap this one.

Wallpaper panel overlapping and in alignment with laser edge
This image shows the next panel slightly overlapping and ensuring it is in line with the straight laser edge.
Step 4: Prepare the adhesive
Read the instructions provided with your specific wallpaper adhesive. Prepare the adhesive accordingly in a clean container or bucket, ensuring there are no lumps or clumps.

Diane Hill applying adhesive to the wall with a roller
Step 5: Apply the adhesive to the wall
Start by applying a thin layer of adhesive to the wall using a roller for the main area and a brush for the top, bottom, and around any sockets or switches. Begin from the top of the wall and work your way down. Make sure to cover the entire area where the wallpaper will be placed and paste around 10cm beyond where your wallpaper will fall.

Diane Hill applying adhesive to the top of the wall with a brush
Step 6: Hang the wallpaper mural
Create a straight edge for the first panel using a laser or spirit level and pencil mark. Carefully position the first panel of the wallpaper mural at the top of the wall, aligning it with the straight edge and ensuring it is straight. Gently press the top of the wallpaper against the wall and allow it to adhere to the adhesive. Use a wallpaper smoothing tool to smooth out any air bubbles or wrinkles from the center towards the edges.

Hanging the first wallpaper panel using a laser and smoothing tool
Cutting around the windows will require you to piece in off cuts to get the best result.

Cutting the wallpaper around the windows
I decided to wallpaper over the corner cupboard for a seamless look. I absolutely love the final result, but please note this is very fiddly work which should be undertaken by either a professional or someone who has experience with DIY.

Corner cupboard covered in 'Rosa' wallpaper
Step 7: Continue with the remaining panels
Align the next panel of the wallpaper mural with the previous one, making sure the pattern matches seamlessly. Repeat the process of pressing the top against the wall and smoothing out any imperfections. Use a utility knife to carefully trim any excess wallpaper at the top and bottom edges. Hold a straight edge along the edge of the wall and cut along it to ensure a clean, straight line. You’ll also be using this method to cut around doors and windows. Continue with the rest of the panels until the entire mural is installed.

Remaining 'Rosa' wallpaper panels hung up in Rosie's bedroom

Up-close look at 'Rosa' wallpaper
Step 8: Clean up and let it dry
Clean any adhesive from the face of the panels, skirting boards, or nearby surfaces using a damp cloth. Allow the wallpaper mural to dry according to the manufacturer's instructions. It usually takes a few hours or overnight.
And that's it! You've successfully installed a paste-the-wall wallpaper mural. Step back and admire your new decorative wall!
 Rosie's finished pink chinoiserie bedroom
Finishing Touches
We added some dainty pink bedcovers, floral cushions made from fabrics in my Harlequin x Diane Hill collaboration, and a beautiful studded headboard that was gifted to us from The Headboard Workshop to finish the room off.
If you want you want to create your own pink bedroom sanctuary then take a look at my Think Pink collection for all things pink or, if you'd like to install your own wallpaper mural then take a look my other chinoiserie wallpaper designs and see which one is your favourite!
It really is a calming wonderland of pink. I'm so glad Rosie loves it, and I hope you love it as much as she does!
If you loved the tips and tricks in this blog, then make sure you sign-up to receive even more amazing chinoiserie home decor ideas and be in with the chance of winning a FREE custom original painting!

Amazing! Breathtaking, and very tricky but well-done install around the door and window! So pretty! But, that’s what we look forward to from you, gorgeous rooms!
Beautiful job! The pink room looks wonderful. Feminine and soft, yet not frilly. Really, really lovely. 🩷
Lovely ♥️
Your daughter is very lucky! Her room is gorgeous!
What a gorgeous space! And thank you for the detailed how-to! Anything just to avoid having to deal with contractors🤣 Seems to be a universal phenomenon, lol.
By the way, I admire your work,
Yours,
A fan from Budapest
Absolutely lovely!!! 👏🎉😍💟